Using Fullstack Web frameworks
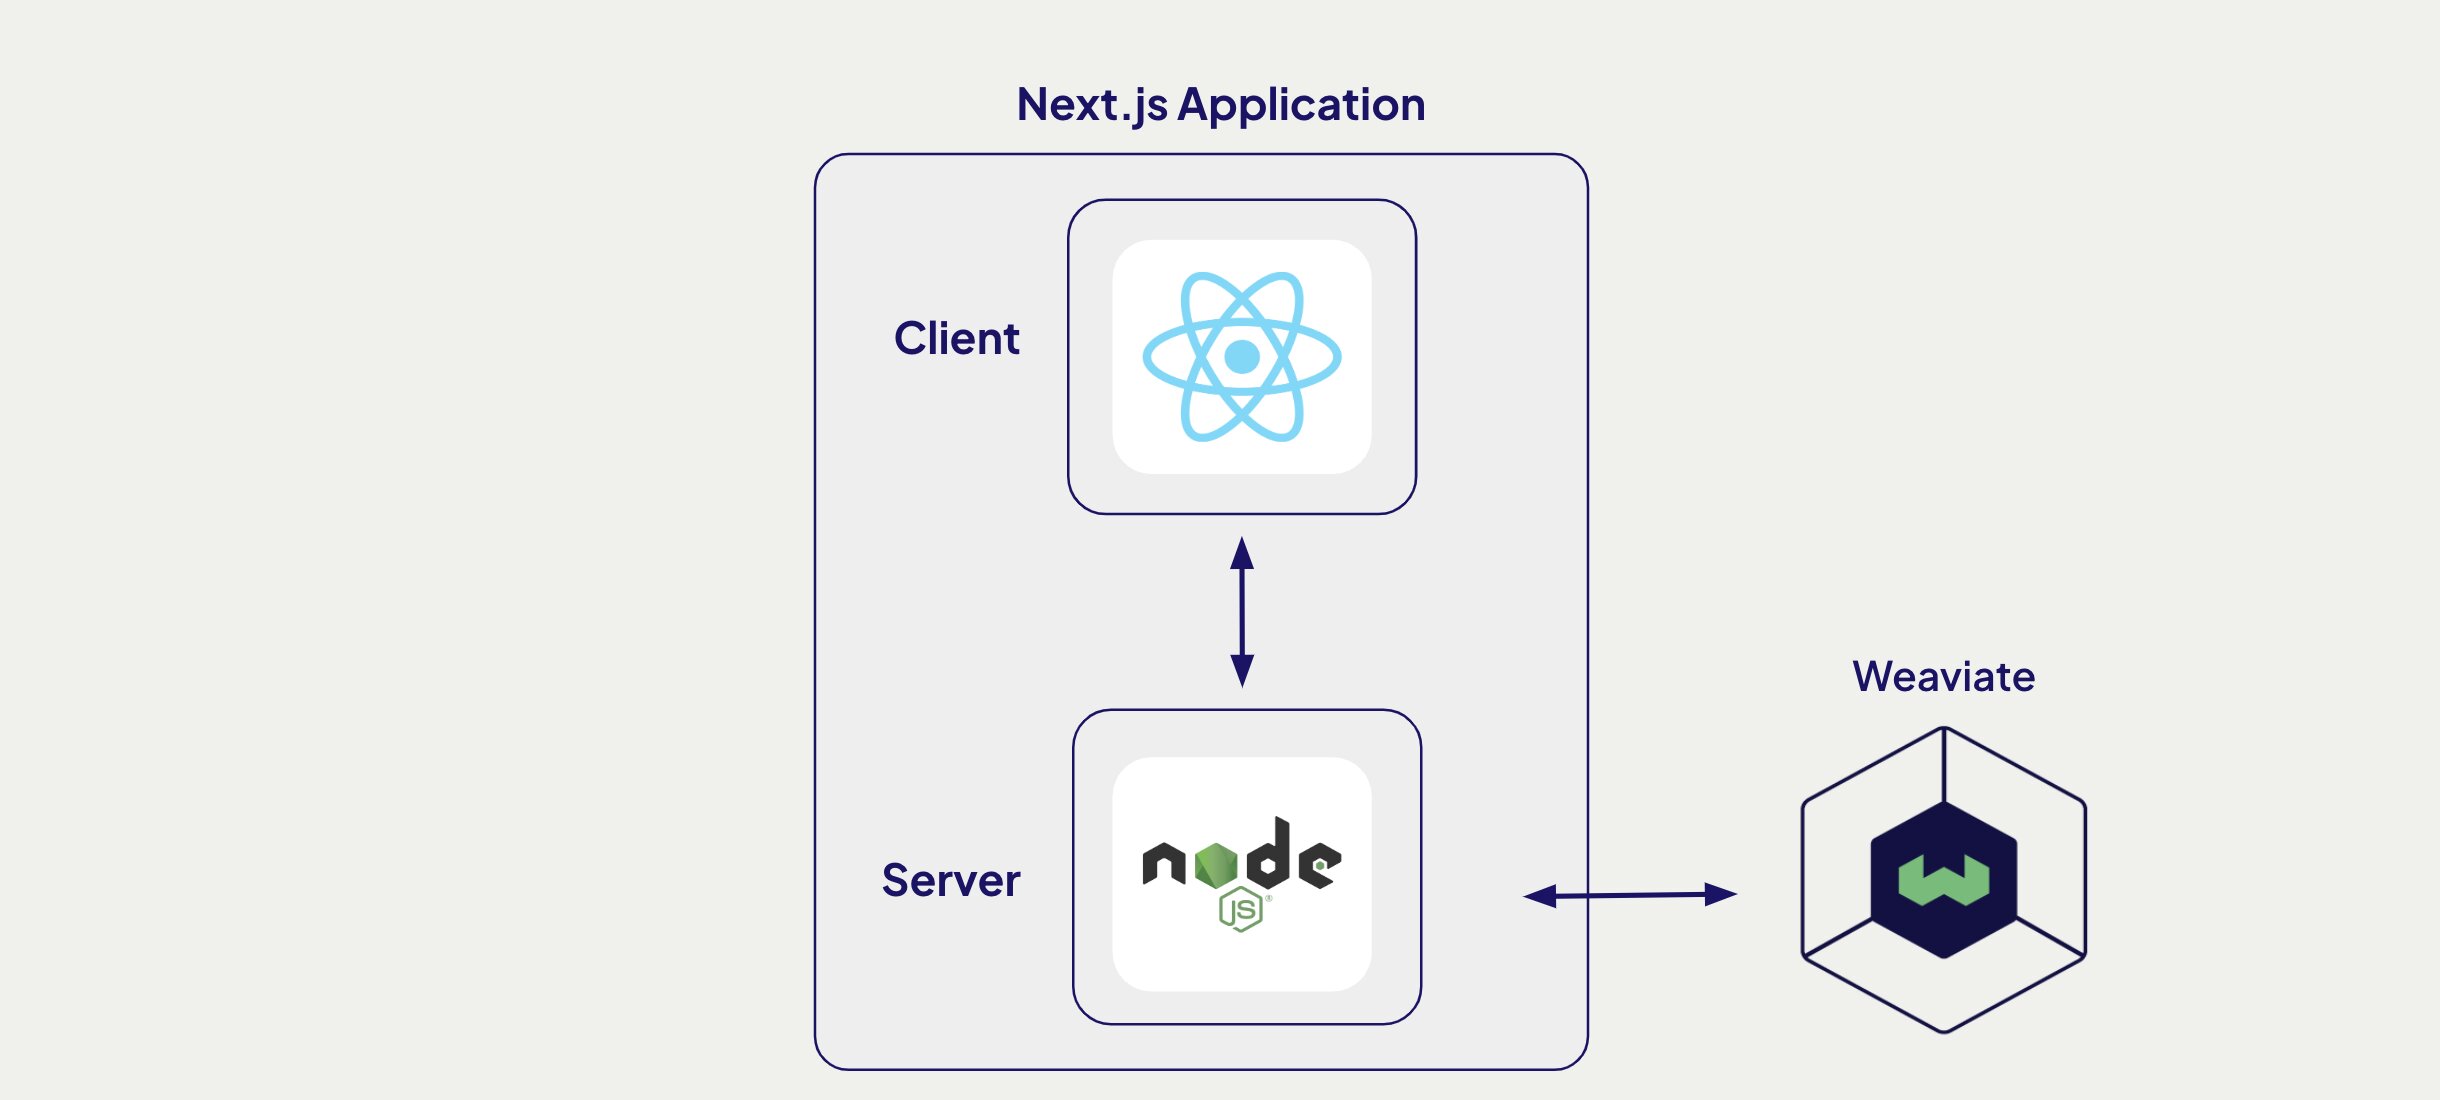
This approach involves having a single tool to build both your server application and client application. In modern web development terms, such a tool is called a fullstack web framework. For this example, we will be using Next.js
Building with Next.js
1. Create a Next.js application
To create a new application with Next.js, run the following command in your terminal.
create-next-app <project-name> –ts –app
2. Install project dependencies
With our project initialized, install the weaviate-client to manage communication with our Weaviate database.
npm install weaviate-client
3. Setup your Weaviate database
We'll start by creating a free sandbox account on Weaviate Cloud. Follow this guide if you have trouble setting up a sandbox project.
You will need your Weaviate cluster URL and API key. If you don't already have one, create a new Cohere API key, we use Cohere as our embedding model. When done, add all three to your .env file.
COHERE_API_KEY=
WEAVIATE_URL=
WEAVIATE_API_KEY=
3.5 Add data to Weaviate
Follow our recipe on loading data into Weaviate to import data to your Weaviate database.
4. Initialize Weaviate
Create a file in utils/weaviate.ts and paste the following code in it. The code helps us create a connection to our Weaviate instance hosted on Weaviate Cloud.
import weaviate from "weaviate-client";

const client = await weaviate.connectToWeaviateCloud(process.env.WEAVIATE_URL as string,{
    authCredentials: new weaviate.ApiKey(process.env.WEAVIATE_API_KEY as string),
    headers: {
      'X-Cohere-Api-Key': process.env.COHERE_API_KEY as string
    }
  },
);
4. Create a Search Server Action
Next, in ./utils/action.ts, paste the following code. With this we can run semantic searches with nearText() by calling the function vectorSearch() in other parts of our application.
"use server";

import { connectToDB } from './weaviate.ts'

export async function vectorSearch(searchTerm: string) {

  const myCollection = client.collections.use('MyCollectionName');

  const response = await myCollection.query.nearText(searchTerm, {
      limit: 8,
      returnMetadata: ['distance'],
    })

  return response
  }
5. Fetch data from your server in your client application.
In the ./app folder, paste the following code in page.tsx. We run a search on our client and display the results on the webpage.
import { vectorSearch } from '@/utils/action.ts';

export default async function Home() {
  const search = "water sports i can win a medal in"
  const data = await vectorSearch(search);

  return (
    <html lang="en">
      <body>
        <h1>
          { data }
          </h1>
        </body>
    </html>
  )

}
6. Run your Fullstack App
In your terminal, run the following command to start your application.
npm run dev
Your application should be running on localhost:3000.
Other frameworks
Although only detailing Next.js in guide, you can build with Weaviate using a number of fullstack frameworks including but not limited to Nuxt, Solid and Angular
We have a list of starter applications you can play around with as well.